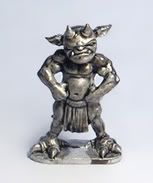
My goal in writing this is to give you an idea of my working and thought processes as a project like the
Mordor Troll comes together.
As always, the model was primed white. I like both
Krylon and Games Workshop spray primer, but I like the price of the former much better and used it on this project. This excellent website is a great visual reference for anything from the films and I used it again here:
Lord of the Rings Image LibraryPainting on the troll began with a series of controlled dark brown washes on the flesh areas. By controlled, I mean that large pools of color in places where they
didn’t belong were removed with a separate dry brush that’s readied at the side of my painting area for that purpose. Thin your paint considerably – I go about 20% pigment to water, but it’s a very touchy-
feely process depending on the color and will come better with experience. Getting the hang of doing clean work with thinned paint
isn’t easy, but it will pay dividends once you start to master it. Think about these initial layers as your first chance to describe the model. Brush strokes should match the movement of the area being painted. For instance, paint laterally across a bulging stomach or beefy thigh; don’t just slop on a wash without thinking about how the paint is being applied and settling onto your model. The
troll's back was washed an additional time to deepen the crevasses and complete the initial coloring.

I like starting from white and washing on the first few base coats because it immediately gives the model some life and quality to the paint coverage. Now that there was a rich brown base, I started building up the highlights on the skin. My paint is always thinned to about the consistency of whole milk, but not to the point of the beginning washes. The model is nicely sculpted and it's fairly clear where areas of light and shadow should go. Generally all but the most recessed areas were painted with a slightly lighter shade than the wash. Increasingly smaller surface areas were painted with increasingly lighter shades - almost like a topographical map. Where the transition wasn't smooth, I mixed up a glaze of about 30% gel medium, 40% water, and 30% paint. This was brushed on thinly and smoothly to help even out and blend the highlights together. Then, if needed, more highlights were brought back on top of this glaze. You can see the product of this in the skin tones of the face and arms of the troll. Again, let the paint help describe the shape of the model when you apply it - almost like a wire frame model. For example, the paint was applied laterally around the legs like a mummy would be wrapped. This helps define the shape of the object being painted. Take a look at the picture above left. I thought this was easier to see in black and white.

Next up was the armor. I used metallic paints, but still applied them in a non-metallic fashion in order to heighten the effect of the highlights. All the armor areas were first base coated with a bright orange. Yes - it looks terrible at first, but helps to eventually give the appearance of well-worn metal when thin metallic layers are painted over it. This was coated with
GW Chainmail mixed with a small amount of black. The small pieces of the armor that I felt would receive the most wear were left orange. Paying attention to where the light would strike the figure, I highlighted up to a mix of about 1:1
Mithril silver and white. Areas that needed a bit more shadow were glazed with a mix of dark brown and black.
Details of the model were then painted. These include the fabric of the
troll's tattered blue rags, gloves, and leather belts and buckles. All were done with an awareness of how light would spill across the model. The parts that would be most exposed to light were slowly brought up to a lighter shade.
I worked on the base separately. It was built up with modeling clay and covered with sand and small pebbles. A rider of
Rohan was lightly converted and placed where he could be easily crushed by the pitiless metal troll. This was all primed white. Take a look at my previous basing tutorial
here for some more ideas. Birch seed pods were broken apart and used for the leaf clutter. There's some great information
here.
Now's the time to find them outdoors - so hit those local parks! The troll was pinned into both points where his feet touch the base and a small bit of heavy duty epoxy was used to make sure he wasn't going anywhere.
I hope this gives you some insight into the model. Some pictures will be coming soon!