So you've got a base coat or an initial wash or two on your model. You've started building up the highlights and it's looking pretty good. If you've gone this far, your model is more than tabletop worthy and is probably already impressing the local gang. Want to take it a step further and try a new technique? Then glazing may be for you.
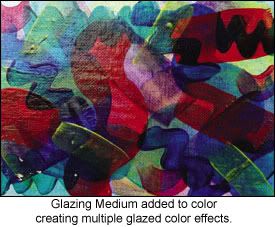
Glazing over a model is just that - you're creating a thin and slightly tinted film of paint that will inform the colors underneath. Think of it like placing one color of stained glass over another.

Glazing is a boon when used sparingly, but watch out. Too much glazing will drain your piece of it's immediacy and impact. It's just like Xanax - sure it will get you on the plane, but take too many and you're not going to be very interesting company when you get where you're going. Too much glaze can also create a glassy effect that will rob the model of the light it's trying to reflect. I often follow a glaze with another round of slight highlights to add a bit more punch to the surface of a model. The acrylic medium you would use to create a glaze comes in many different forms with varying viscosity, sheen, etc. I prefer a fluid medium for minis. So we're all on the same page, here are links to some of the products that I like to use: Medium


To illustrate some basic glazing techniques, let's take a look at some work-in-progress shots of the Stegadon currently on the bench. The first two pictures show the model after receiving a few green and blue washes to develop a starting tone and some built up highlights to the belly. This guy is looking pretty good, but what if you would like the transition of color between the highlights to be a bit more smooth? Simple - time to mix up a glaze!
The process of making a good glaze depends on the color and how much you'd like to knock the undercoat back, but in general, a mixture of about one-third paint, one-third medium, and one-third water will be a good starting point. Unless you are going for a specific effect, glazes should go on thinly. Make sure your brush isn't overloaded and sagging with paint - using an appropriate amount will take some practice. The nice thing about glazes is that they are very forgiving. If they go on too thick, you've enough open time to work any large deposits out with your brush. One application should usually alter the color only slightly.


Let's focus back in on that Stegadon's belly. Here are shots of the model after receiving his first glaze. I mixed up a very light yellow and brushed it on over the majority of the underside. Take a look at the images after the jump and you should be able to see a distinct difference between the model after this first glaze and the previous stage with highlights only. The glaze evens out all the pronounced highlights and makes them gel together.


The glaze was starting to work, but I felt that it could benefit from one more light application. The images to the left show the result of this second pass. There's now a unified, but not entirely even and boring coat of paint. This is starting to achieve that beautiful sort of surface that comes from glazing.
Though as mentioned above, if you compare these shots of the model after a second glaze to those of the first two images with only the highlights, you can see that some of the immediacy and impact of the bold strokes of paint in the original highlights has been knocked back by the glaze. This is why I often like to finish with another layer of highlighting as shown below.


With this final step, the model comes full circle in a way. Hopefully you can see what glazing adds to the final piece. The foundation we laid down through all that painting created a rich surface on which our final highlights can ride. What if you find your final highlights are again too stark? You guessed it - glaze it back again and rework your way to the highlights!
Ultimately, glazing is one more trick in your painting bag and I hope it's one you can use. Please let me know what you got out of this article. Was it useful? Anything confusing? Could anything be better? Thanks for taking the time to make it to the bottom :)


 Posted in:

1 comments:
Amazing tutorial. I am going to apply some of your suggestion in an upcoming model I am working on.
Post a Comment